Part 22: Earth Temple
#20 - Earth Temple
Hello everyone. Welcome to I_NEED_WOOD. The world named because I had a very specific need when I created it. A need, come to think of it, that has now been obviated. So I guess I'll be deleting it soon.
Anyway. We need to kill Skeletron again, so let me just fast forward through that. This file is current, so I've got some more hellstone stuff, including the Imp Staff. He's the fat little fellow flitting around Sam's head.
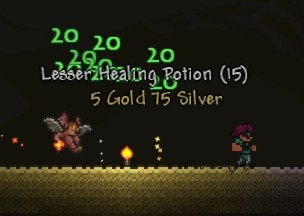
I feel kinda cheated. He didn't even drop anything.

So just to get this out of the way, take a look just above the torch. A good many of the screenshots in today's update are going to have these little fellows flying around. We're using a weapon that drops from the only other boss left in the first half of the game. It's called the Bee Gun and it uses mana to shoot bees that home in on enemies and deal a shitload of damage.
Between the bee gun and the little fire imp buddy we have, we're pretty well set to wreck face in the dungeon.
So, shall we?
Terraria Soundtrack vol. 2 - Dungeon
While that works fine as a dungeon theme, I think I prefer something else instead.

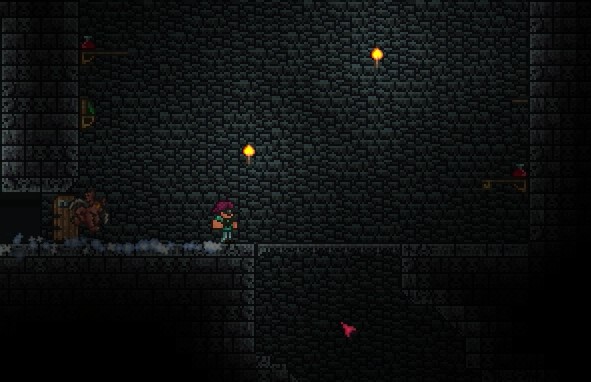
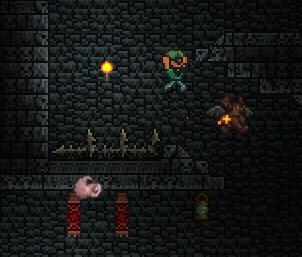
First things first, the dungeon is incredibly dark. So you're going to want to carry a bunch of torches. They also help to signpost where you have and haven't been.
Also present in the screenshot is a switch that presumably operates the nearby lamp, some banners which won't mean anything to us for a very, very, very long time, and a shelf with a red flask on top. You can right click the flasks on these shelves to get potions of the corresponding color. They're only lesser healing or mana potions, but it's still worth pointing out if you're really hurting and need a quick infusion of health.
Shelves can also contain books. It behooves you to thoroughly search these bookshelves, because they will rarely have a magic weapon called the Water Bolt. This magic weapon shoots a bunch of bolts that bounce around the environment randomly and pierce through every enemy they hit.

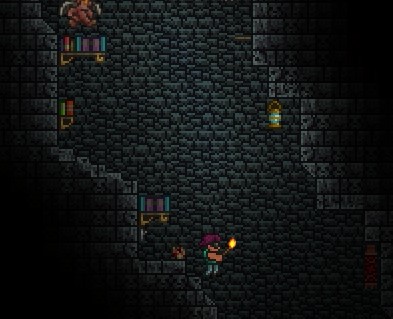
Lastly, the dungeon also has some really freaky decorations. There's artwork all over the dungeon, but it's all horrifying shit like skeletons, or the eye of Cthulhu. Or in this case, an actual skeleton shackled to a wall. Also look closely at the top of the image, you see those little spikes?
They're there, trust me. We'll have plenty of opportunities to see them better.

Right in front of Sam here is one of the dungeon's major mechanics. The dungeon is the only place in the game where you can find gold keys. It's also, mercifully, the only place you can find locked chests. That wasn't always the case, however. If you recall, many updates back I briefly mentioned that sky chests used to be locked. You used to have to go here first and get a bunch of gold keys before you could unlock sky chests.
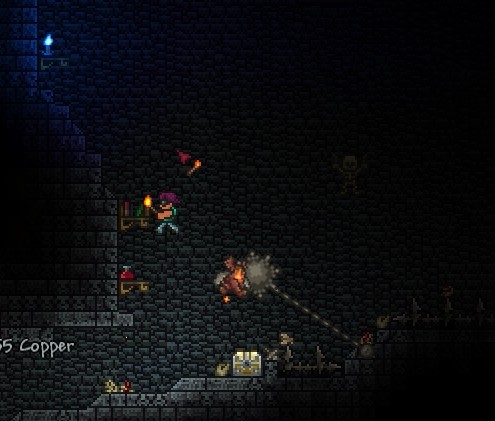
I love taking screenshots in the dungeon. It's always so densely packed with things to show off and explain. Here we can see a locked golden chest, a bunch of spikes next to it, a massive spiked ball trap, and finally a blue candle.
The spiked ball traps appear randomly all over the dungeon. You can walk through an empty hallway, find a dead end on the far side, turn back around, and the empty hallway is now full of these things. Like all the other traps in here, they only damage you.
Navigating the dungeon is never an easy job. We're is kitted out in some of the best equipment in the first half of the game, and there were a bunch of times while recording this that Sam almost died.
Not helping matters are these blue candles. They're called water candles, and they provide a "buff" for a radius around them. This buff increases monster spawns. According to the wiki, monsters will spawn 33% faster and just being near one allows 50% more monsters on screen at once.
So the first thing you should do when you see a water candle nearby is remove it.

Now to start meeting the enemies. This fellow here is the dark caster, and he operates like the fire imps down in Hell. So he'll teleport somewhere near you and start casting magic in your general direction. Magic, I should add, that travels through absolutely everything. You can destroy these magic bolts by hitting them with anything.
These guys appear all over the dungeon and have a bunch of drops. They have a 1.5% chance to drop a golden key, a nearly 100% chance to drop a bone, and they also have some rare drops as well including a Tally Counter (1%; counts the number of a type of monster you have killed; used to craft one of the two mega accessories), a Bone Wand (0.4%; used like our Living Wood wand, but places bone instead), and a Clothier Voodoo Doll (0.33% chance; allows us to attack the clothier NPC).
Oh right, the Clothier NPC. Once you kill Skeletron, the old man is no longer cursed, and will move into your base as a Clothier. He sells various vanity sets, including the set that Sam is wearing in these screenshots.
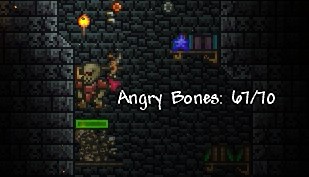
Angry Bones are one of the most common enemies in the dungeon. Just your regular skeleton type monster. They share drops with the dark casters above. They try and ram into you as an attack, but you can largely nullify their threat by just grappling into the ceiling or walls.
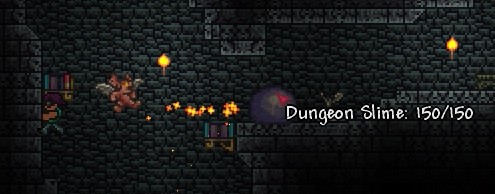
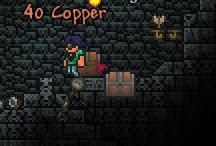
Of course the dungeon has its own type of slime. This fellow only has one drop, and you can see it right inside of him - a golden key. These guys are frustratingly rare at times.
So I'm sure you're wondering what use golden keys are. I've spent a bunch of paragraphs talking them up, after all.
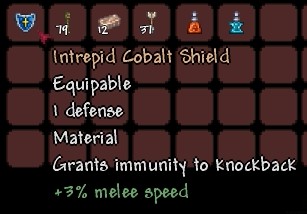
There are a bunch of things that can come out of locked chests. This is one of the few items that absolutely everyone wants. This cobalt shield can be combined with our obsidian skull to create the obsidian shield, which combines both effects. The obsidian shield is also an integral part of the other mega accessory, the one that grants immunity to all debuffs.
One of the reasons I hate losing my recording of Rivershire's dungeon is that we found every golden chest item in that world. This recording only has a handful of them.
But, locked golden chests can also drop...
Magic Missile - (Shoots a magic missile that you can control with your mouse. Deals 27 magic damage. Can be used to make a decent magic weapon in the second half of the game.)
Muramasa - (The first auto-swing weapon in the game. Deals 19 melee damage, but swings super fast.)
Aqua Scepter - (Shoots a spray of water. Deals 16 magic damage, but pierces through enemies.
 )
)Blue Moon - (The second flail item in the game. Deals 23 melee damage. It's nice, but it has an upgrade in Hell.)
Handgun - (Deals 17 ranged damage. Kinda mediocre on its own, but is used to make a Hellstone gun.)
Valor - (Yoyo weapon. Deals 22 melee damage. Nice, but by the time you can get this, you can get its upgrade from Hell. An upgrade, I should add, that only drops after Skeletron has been defeated.)
Shadow Key - (Remember that locked purple chest in Hell? We can unlock it with this. Unlike golden keys, this one isn't used up when you unlock something with it. So one key is enough to unlock every chest in the underworld.)
With the exception of the magic weapons, you can kinda see a pattern emerging. The stuff you can get from the dungeon is "nice, but is outclassed by stuff from Hell."
Also the reason I was so down on the Aqua Scepter is that the Water Bolt book deals 19 base damage and also pierces through enemies. The bolts are generally easier to aim than the arc of water, deal more damage, and can occasionally bounce through your target multiple times. Even better, if you're daring you can also make forays into the dungeon before defeating Skeletron to hunt for this. As long as you stay above 0 feet, the Dungeon Guardian won't spawn and instantly kill you.
Speaking of the dungeon guardian, I doubt I'm gonna show him off unless it's with a full team people in multiplayer. It's a skeletron head that only spawns if you venture into the dungeon before defeating the boss. This guardian has 9999 HP and enough defense that it will only take 1 damage from any attack.
The commonly accepted way to kill it is to kite it back and forth across the world with a minecart track. Absolutely riveting, I would imagine.
Anyway, back to the pretty pictures.
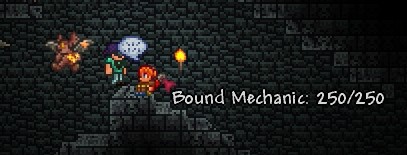
So this lady here is the reason you'd want to venture into the dungeon. She's yet another NPC, and the only one that spawns only here. Though you can also find the goblin merchant in here if you have yet to rescue him.
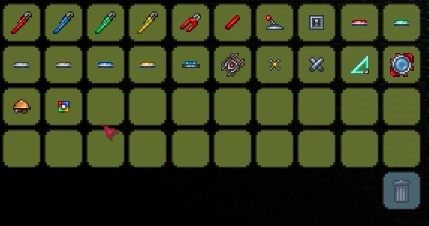
She has a pretty extensive list of things for sale. The mechanic, as her name would suggest, allows us to place and manipulate wires.
Red Wrench - 2 gold coins - (Place red wire)
Blue Wrench - 2 gold coins - (Place blue wire)
Green Wrench - 2 gold coins - (Place green wire)
Yellow Wrench - 2 gold coins - (Place yellow wire)
Wire Cutter - 2 gold coins - (Remove wires)
Wire - 5 silver coins - (Now we can create our own traps.)
Lever - 30 silver coins
Switch - 20 silver coins
Red Pressure Plate - 50 silver coins
Green Pressure Plate - 50 silver coins
Gray Pressure Plate - 50 silver coins
Brown Pressure Plate - 50 silver coins
Blue Pressure Plate - 50 silver coins
Yellow Pressure Plate - 50 silver coins
Teal Pressure Plate - 50 silver coins - (I'm sure you can guess what all these items do.)
Booster track - 50 silver coins - (Used to launch minecarts forward with great speed.)
Actuator - 10 silver coins - (Difficult to explain quickly. Basically can be used to make blocks disappear.)
Junction Box - 2 silver coins - (Allows wires of the same color to cross without connecting.)
Mechanical Ruler - 1 gold coin - (Draws a semi-transparent grid over the screen. I'm not entirely sure how this differs from the ruler that the goblin sells.)
Mechanical Lens - 1 gold coin - (Allows you to always see wires while in inventory.)
Engineering Helmet - 1 gold coin - (Vanity item!)
Wire Bulb - 5 gold coins - (Apparently a powered light source. I've never used this.)
So yeah, with this lovely lady we can now make our own traps.

Every dungeon has a group of chests that are under special lock and key. The items contained in these chests are some of the most powerful in the game, and we can't get the keys until the second half. Furthermore, we can't even unlock these chests until most of the way through the second half.
Yeah, the weapons inside are that powerful. I'll cover these eventually, but please understand if it takes a very long time to do so.
Regular wooden chests in the dungeon always have at least one golden key inside.


Be prepared to fight massive crowds of enemies, in here. I count at least 7 angry bones, plus a dungeon slime. There's also a dark caster offscreen sniping at us with his water bolts.

This is an alchemy table, and is actually a dedicated potion crafting station. It's like the bottle-on-a-workbench, except better. This thing occasionally will not consume the materials for a potion!

I hope all these screenshots are doing a good job at impressing on you just how dangerous the dungeon can be.
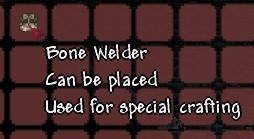
Occasionally locked chests will have this. This is yet another furniture station, used to make bone furniture. I briefly mentioned above that most of the enemies in here will drop a bone item. They can be used as a thrown weapon as well as to make stuff. The best ranged weapon set in the first half uses bones as one of its two primary ingredients. Bones and cobwebs, actually.
Because of how many bones drop from enemies, you'll almost never have a shortage of them.

Dungeons are often pretty long complexes. I_NEED_WOOD is a small world, so we're actually deep enough right now to be in the pre-Hell background. It's not unheard of for dungeons to actually end in Hell in small worlds.

We finally find a water bolt book here. They're more common than this, but we haven't been scouring every bookshelf. They're pretty easy to find. You just have to mouse over every bookshelf until you get this icon. You can also just look at them, because Water Bolt is always a blue book with a gold label.

We already have a better one, but here's its base stats.
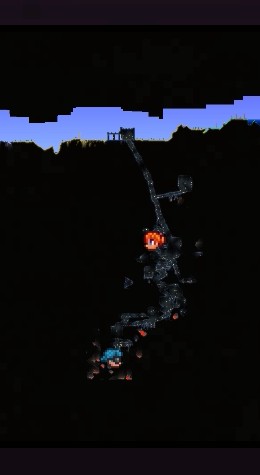
Also like I said, I_NEED_WOOD is not a big world. We'd be barely a quarter of the way down a large world's dungeon.

This little thing behind us here is a summoner's table. You can right click this to get a 10 minute buff that allows you to summon more minions.

The dungeon oftentimes has dickish design like this. There's no good way to get down into that doorway. It's possible to get down there without landing on the spikes, but it's not very likely.
Finally, the last enemy in the dungeon comes to say hello. This is a cursed skull, and true to its name, being hit by it will curse you, leaving you unable to use your weapons for 5 seconds. In addition to the usual drops (golden key, bone wand, tally counter, bone), the cursed skull also drops something called a nazar. A nazar is the last piece of the mega debuff accessory you can get in the first half of the game, and it has a 1% drop rate.
Ask me sometime about spending 45 minutes farming this item from these assholes.

While I could show you more screenshots of the dungeon kicking my ass, I think you get the point by now. I've also run out of things to show and talk about. So I'm just gonna call the update here.

Excuse me, now I've run out of things to show and tell. This trap occasionally appears in the dungeon. It just races along the walls and ceiling doing its own thing. Like everything else down in this forsaken pit, it won't harm any enemies, but will more than happily maim you.
NEXT TIME: The first roundup. We're doing everything from finding legendary weapons to taking up hornet extermination as a hobby. We're getting closer to the end of the first half and its climactic confrontation with that horrible monster.